Wednesday, May 30, 2012

Do You See What I See?

I know it looks like some still-life that ought to have deep meaning and make you reminisce about the good times, but it's actually my attempt to photograph one of Jason's hiding spots for things. My hair brush just happened to be out on the back porch because Jason was playing with it. In the sand, mind you. Anyway, see what's in the crack between deck boards?

So that's where my spatulas went! This is a result of the dishwasher battle that we have daily. He opens the dishwasher and pulls some utensil out as fast as he can before I can stop him. Scary when it's knives he's pulling out. Usually dinner knives, but every now and then a steak knife. I really wish he hadn't broken/figured out the lock I put on the dishwasher. It was this one:
Image
It worked great for a while. My only regret is that I didn't get it sooner. Then there's this one that was fantastic... until recently when he, again, figured it out.
Image
It's tricky too! See that little button on the right side with the green above it? You have to push that in and slide it up, which then reveals red instead of green. Most adults have difficulty with it. But he takes his time and concentrates.

Oh, and the neighbor girl taught him, inadvertantly, how to climb on top of the counters. I guess she didn't teach him how per say; she just put the idea in his head that the counters are another surface to sit on. He already knew how to climb his dressers and just applied that to kitchen drawers and cabinets I guess. Yay. :/

Tuesday, May 29, 2012

The Painted Counters - Chapter I.2

Once upon a time, a long, long time ago, I had dark green / hunter green countertops. *cue the record-scratching, stop-in-your-tracks sound* Oh wait. I still do mostly. I just have a white island countertop now. Which is a promising start. But it's been about a year of people looking at me funny when they hear my explanation of why my counters look crazy/gross and feel rough/textured. Almost a year of that and procrastination from the fear that it really would not turn out well even with fixing it.

Rewind.
Anyone remember this post? Artwork on my Countertops!
The house had laminate dark green countertops. The laminate that's supposed to give the illusion of granite, kind of. So, not terrible, but I was NOT a fan of the color.

And since day 1, I've dreamed of having white counters, but saving for some kind of solid surface was going to take a loooooong time. Then one day, I ran across this post from Pretty Lil' Posies. She made it sound so so easy, and I thought, "I can do that!" so I set the wheels in motion by buying craft paint, etc.

It all seemed to be going well, until I added the green.

My inspiration piece of silestone had flecks of bright green that was transparent, almost glass-like. But my attempt to mimic that just looked neon. So I tried going over it with some white to tone it down, but it still didn't look good. It was time to face the music and get to paint removal.

The craft paint was water based, so I tried using water and a scrubber. It was slow-going, so I thought, 'Well, now I know what I'm doing and how I want it to look, so I'll just chip away at this over time. Meanwhile, I'll do the island counter.'

Sadly, I forgot much of what I learned from that first attempt and what I should have known about painting. This next part is rather embarrasing to admit, but it's part of the tale. I don't remember anymore why I did this - maybe just because the island was a lot bigger than that first section and I was in a hurry, or maybe because the first section took so many coats to cover the green that I thought this would be a shortcut, I don't know - but I decided to pour a big puddle of primer directly on the island and then smooth is out and work it around the entire space. BAAAAD IDEA. Apparently I forgot that in the first post, I mentioned that the primer dried fast.

Brase yourself for lots of cringing. This is like horror painting. The Freddie Krueger of painting.


Are you ready for this?


I'm so ashamed! Look a way! Shield your eyes! Ohmygosh it's so embarrasing!


I tried to get the whole counter covered with the fast-drying primer, because I didn't want to waste the 2 or 3 cups of it that I poured on the counter! Wow was that the wrong thing to do. It was sooo bumpy and rough.

And then, not knowing enough about household painting, I thought what might fix it was just to paint over it. Turns out, though, that it's not like spackling where it'll just fill in the crevices and grooves. But "Trial & Error" is becoming my best friend... that I hate.

More primer later, I started with the gray sponging.

And then another shade of gray sponging.

And then the realization that it was too much gray. No biggie. All I needed to do was go over it with some white sponging.

Shoot. Still too much gray. Need more white. (Can you see the line where more white meets gray? I was working from left to right and the line is sort of diagonal from the top left corner of the picture.)


And more white and more white and more white. Some people thought it looked pretty good, but I still didn't like it and I couldn't see the end of adding more white to get it the way it was supposed to look. And it was still really bumpy and textured. Grrrrrrrr. Did I really just mess this up again?!? Here's a close-up.

I know it's sad, but please tell me it's also a little funny. I think it is, at least. Mostly 'cause it's so embarrasing, though. And because it's in the past.

Thursday, May 17, 2012

I dyed.

I've actually been dyeing for a while now (har-har).

It started with my towels. They were once upon a time white. Then they became yellowy-orange in the middle where they hung on the towel bar. Strange and ugly. (I promise it wasn't from use. Some handtowels did the same thing, but are obviously not used the same way. Just to clarify. And they all get washed regularly. So no speculating about bad hygiene, ok?) Aaanyway, I figured for the first attempt in my life at dyeing anything, it couldn't get much worse than the white/yellow/orange dinge that it already was. And I think I was right, even though it took a few tries and several packages/bottles of dye.

Sorry, I didn't take any dingy before pics.

If you go to the Rit Dye website, they have a color guide, which tells you how much of which colors to mix to get the EXACT color that you want. I wanted gray. Specifically Neutral 2 #317. For that I was supposed to mix 1 tsp Tan + 1/8 tsp dark green + 1 c. water.

Problem was, I was dyeing towels. Thick, hotel-size towels. Two bath towels, two washcloths, and 1 bathmat. That meant I would have needed a TOOOOOON of dye. Especially because I think tan only comes in liquid form, which isn't as concentrated as the powder. And you can't use 1 tsp tan liquid and 1/8 tsp dk green powder.

Those measurements are for small cotton items, like a plain t-shirt, so I needed to multiply the whole thing by 8 or more. That = too much money.

All these things I think I figured out through the "error" part of trial and error. So I ended up w/ dark green towels. Think hunter green or forest green. :(

Then I bought a few boxes of Rit Color Remover and got light green towels.
Round 1:

Round 2:

That was about as good as I cared to get it. I gave up on removing all the color. I also gave up on mixing colors to get the exact shade of gray I wanted. So I just bought black. I figured a box of black powder would get toned down enough with so many towels to come out some form of gray.

And it did! Oh happy day! They were charcoal gray and they were lovely.

Then I washed them... and the color faded. :(   Unevenly. :(   So I test-washed them again and they faded even more. Unevenly again. At that point they were looking not-so-hot. Time to buy yet ANOTHER thing of dye. (I'm pretty sure I've been keeping that company alive by throwing money at them every few weeks.) This time I googled "dye setting". Cross your fingers with me that two rounds of 1 c. vinegar + 1/2 c. salt + detergent will result in no dye-loss! And here they are now.

Aren't they beautiful!?! I'm so excited. Next step: paint bathroom a complimentary light gray. (But that won't be happening for a loooooong time.)

I had so many questions while doing this, and Rit just doesn't have enough answers on their website. So I made a lot of mistakes along the way. But in the end, I think they came out well.
Ph-ew! (Let's hope this is the end anyway. At least for the towels. I've also been working on my sheets and pillow cases, with similar success rate - i.e. lots of mistakes. But they're not done yet, so that post will have to wait. And my wallet needs a break from buying dye and color remover.)


p.s. Some other tricky things about dyeing:

If you want to do it in your washing machine and you have a new energy-efficient washer (the kind that doesn't have a center spoke/arm), dyeing is a lot trickier. Dyeing is best done by filling up your washer with hot water first, then adding the dye, then mixing it (either by washer agitation or by stirring it manually somehow), and then adding the items to be dyed. Unfortunately, the new washers won't fill up enough if nothing's in them. So you have to add your items, let it fill up with water, pause it, remove & ring out the items, set the sopping wet items aside somewhere, add the dye, mix, and put the items back in the water.

Then, if your washer is like mine, it will only stay paused for less than 15 minutes. Somewhere around 13-14 minutes, it'll drain all the water. But it's best if the items can sit in the dyed water for 30, or as long as possible. And with all the hoops you have to jump through just to add the dye, you've waisted about 5 of those precious 12 paused minutes. (All of this was discovered through my multiple attempts at dyeing these towels. :/  ) SOO, what worked best was to pause it to do the whole adding dye steps, start it again for 30 seconds or so, then pause it again and set the kitchen timer for 12 minutes. Then when the timer goes off, start it again and let it run like normal.

I checked it a few times after that so that when it got to the rinse part of the cycle, I could add my "setting" mixture to the cold water rinse, being careful not to pour it on the towels themselves, since the detergent seems to remove color wherever it's directly poured onto them.

Friday, May 4, 2012

Fabric Love

:D I am grinning from ear to ear. :D :D :D

Tax return + a unique celebration = FABRIC!!!!!!!

These just arrived in the mail!!!

All from fabric.com.

I was a little nervous about that middle one (Valori Wells Wrenly "Wildfield" in citrus) because in some pictures it looks really bright and fun, and in other pictures it looks more muted. Happy to report it's super bright in really life. The big yellow flower is more of a chartreuse, and the background has an ever so slight green tint, but other than that, it looks a lot like the picture above. And it's the only one that's not home decor weight. It's a soft, lightweight cotton.

The two Waverly/P.Kaufman "Cross Section" ones are awesome. The Ty Pennington "Honeycomb" (top right) and the Premier Prints "Acres Twill" (bottom left) are probably my two favorites out of this batch though.

I'M SO EXCITED!!!!!! Now, to make just pillows? or... any suggestions?

**Note to self: Cross Section - dry clean only. Wildfield & Honeycomb - cold wash, tumble dry low. Acres Twill - gentle detergent, air dry, no dry clean.

Thursday, May 3, 2012

Stools, Comfy Stools part III

Drumroll please! Final assembly!

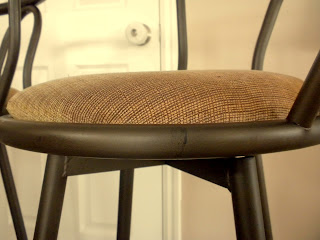
Before I gave in and added vinyl, I assembled a few of the cushion/stools, like so:

And things were looking up. Until I realized that waterproofing spray wouldn't protect the fabric from dirty cat paws and dirty little hands and whatever dirtyness I bring to the table cushions. Unfortunately, the new fabric and batting fabric stuff all folded and stapled was already creating a minor problem with thickness underneath, making the screws juuuuust barely long enough to reach into the plywood. I knew with vinyl added, the old screws wouldn't cut it.


See how the fabric was creating a gap? That's because the screw wasn't quite long enough to really dig into the plywood. So I bought some longer plywood screws (sadly, they didn't have any in the same oil-rubbed bronze color) to use after the vinyl went on.


They worked like a charm. And no matter that they're gold, 'cause they're hidden underneath our bums.
Done outside so as to not wake Jason up.


Ahhhh, so so nice to be DONE.
(On some of them, I forgot to check where to place the pattern before I screwed it into the chair. oops. Na ja. Oh well.)


That last one, see how the back bars are kind of squished into the seat cushion? Kind of like back fat. Well, I noticed it before putting the vinyl on, so I took out all the staples and trimmed off more foam and then restapled and vinyled. Bummer that it didn't seem to make a difference. But I wasn't about to take it all apart again.

Overview?


For the other posts on this project: here, here, and here. I know, four posts for a relatively small project like reupholstering stools is a little excessive. But it was my first time and I ran into lots of glitches and set-backs. Which seems to be how most of my projects go. Haha.

Wednesday, May 2, 2012

Stools, Comfy Stools part II

Almost forgot! The befores!

These stools came with the house. Which was great, don't get me wrong. But after sitting in them for several years now for sometimes looong stretches (darn you Pinterest! just kidding I still love you), they were leaving my boney bum a little sore. They needed more padding, bad!

And since they'd get disassembled for extra or new padding, I thought it'd be the perfect excuse time to change out the old fabric. Besides, since painting the walls tan and having beige laminate floors and honey cabinets and tan carpet and brown couches ... this place needed some different, lighter colors.

I was super excited to get these in the mail!
Sooooo pretty!!!!!!!!

Along with the two other ones that I decided on in the first stool post but failed to take pictures of like those above. Woops.

Oh, also in the first stool post I mentioned that I was looking for a way to make them wipeable without covering them in vinyl. I searched high and low for alternatives - linseed oil (turned my fabric scraps yellow), waterproofing spray (worked fine, but I feared stains and dirt would still work their way in), and some EXPENSIVE otter wax. I was hoping I could find a diy way of making the fabric wipeable like toddler bibs or highchair covers. After doing a little research, though, it seemed like those were "treated" fabrics, in which case, I'd have to ship my fabric off somewhere, have them treat it, then they'd ship it back. That = lots of waiting. So I finally caved and bought vinyl. But three out of four fabrics did get sprayed with some Kiwi Camp Dry Heavy Duty Water Repellent. The fabric smelled like camping equipment and was a little nostalgic, but the smell disipated after a couple days. Phew. It was fun to test it:

Okay, now back to actual upholstering.
Once the old staples were out came the fun part!

For two of the stools, I used some green, high density foam. But for the other two stools, I just doubled up on the old foam, like so:

Keep in mind that before this, I had never upholstered anything. Nor had I ever used a staple gun. Haha. I don't know why I do this, but lots of times when I see a project, I think, "I could totally do that." And I know this is absolutely ridiculous, but sometimes I find myself thinking, "I bet I could build a house from the ground up if I wanted to." Hahaha. It might not be OSHA safe and might fall apart before anyone could step foot in it and it might look like this
or this
from the outside, but I would think I rocked it like a hurricane. (p.s. Those are Hundertwasserhaus apartment buildings in Wien [Vienna, Austria] and ...Germany. What city were we in? Somewhere near Darmstadt, I believe.)

Okay, back from that detour.

I found that the stapling worked best to just rotate it. It did not work as well to staple one spot and then staple the opposite side in one spot and then do inbetween. If you ever attempt a round cushion like I did, just work your way around. I did it the less-right way with this one. Can you tell?

Here's a close-up of the folding and stapling.

The fabric actually seemed to want to fold in a certain way. Or rather, it folded better at the points/distances apart as pictured above than if I tried to space the folds out more or make them closer. And it was like that for all of them, so I don't think it was just the fabric. About every 2-3 inches.

The vinyl did the same thing. Although, with the first cushion that got vinyl, I tried to space the folds out more just 'cause vinyl isn't easy to work with so I wanted to fold it as little as possible. That, however, turned out to be a horrible idea. It forced my hand and I submitted to folding it the same as the fabric.

After that it actually wasn't too bad to work with. The above one was the first to get vinyl. So the underside looks a little crazy.

Oh, and I have to mention a little glitch I encountered and remedied. See anything wrong with these staples?

They kept going in all wonky.

I finally figured out that I was actually keeping the staple gun too close to the surface. So instead of keeping it flush with the plywood/vinyl, if I kept it just barely off, they went in the way they're supposed to. I don't know why that worked as opposed to being flush, but it did. Was it the new box / different brand of staples? Was it the different type of plywood? (Two seats were this different, flakier? plywood. The other two seemed like better quality. I have no idea what the actual difference between them was, though.)_
Better quality on the right. Lesser quality on the left.

Or maybe it was just me. Who knows.


Next up? Final assembly! Stay tooned!